

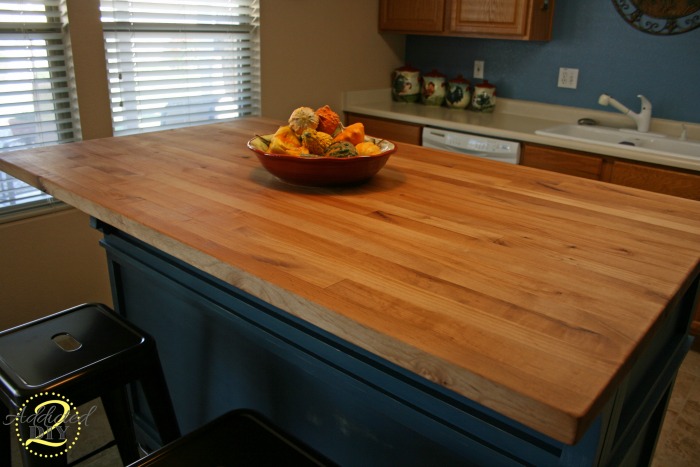
How To Make A Butcher Block Minecraft
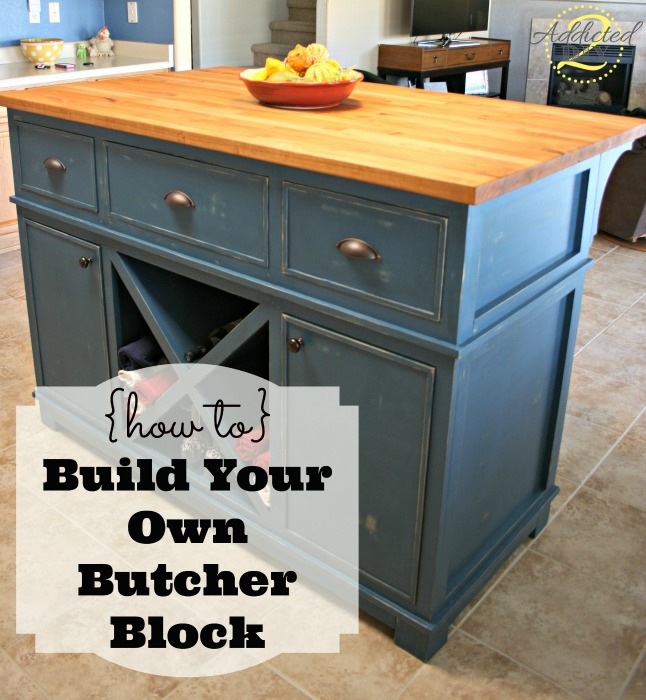
Earlier this calendar week I shared how I congenital thiskitchen islandfor my mom. Equally promised, today I'm going to show you how I built the butcher block table superlative for information technology. I went back and forth, fretting over whether to build a butcher block table top or to purchase one. When I say buy one, I mean my mom. She purchased all of the materials. I was the skilled "wing by the seat of my pants" labor. I searched high and depression for a cheap butcher block countertop that would fit the specifications I needed, but they were crazy expensive! I thought about doing wide planks, but my husband warned me that they might warp after a while and that pocket-sized planks were best. It wasn't until I saw thistutorialonSawdust and Embryosthat it finally clicked.
The most common wood in butcher blocks is maple because of its hardness. I had planned to utilize maple, simply when I went to my localWoodworkers Source,I happened to see the knotty alder. It is a little softer than difficult maple, but however a hard woods and when I discussed it with one of the employees, we both agreed it would exist a fine choice for the island pinnacle. The best office is that information technology was half the cost! I chose my boards and had another employee aeroplane and rip the boards down into manageable sticks for me.
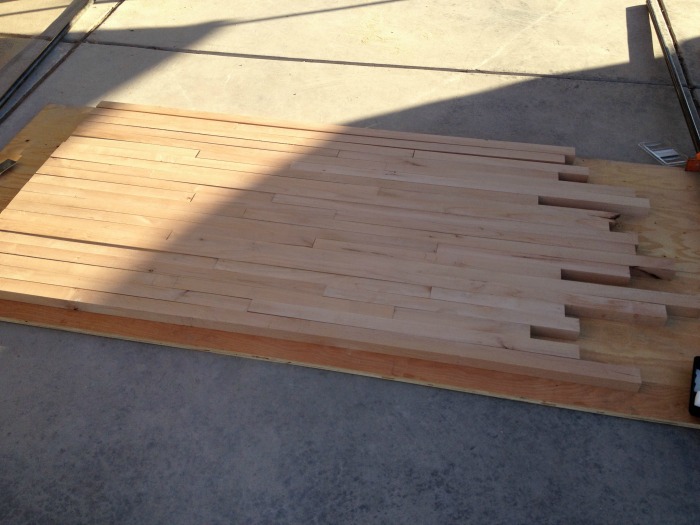
My wood was planed at 1 3/4″ thickness and I had it ripped into 1 1/ii″ sticks. When I got home, I cut all of my long sticks into smaller pieces. I had to cut out some knots (they don't call it knotty alder for naught), just that gave me the random patterns I was looking for. I turned the forest pieces on their sides then my slats were ane i/two″ thick and 1 3/4″ wide.
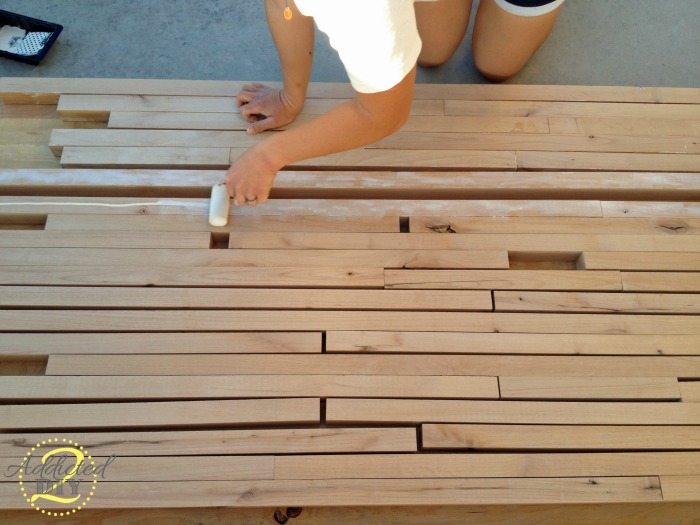
I got all of my clamps lined up and went to work. I used Titebond 3 to glue the pieces together. Information technology is nutrient safe, so a practiced choice for something similar this. I turned the boards to the side I wanted to gum and started laying it on. I don't know if it was the high 80s temps, but the mucilage formed a skin pretty fast on me, so I would work in two rows at a fourth dimension and then stick them together. Squeezing a bead of glue and then using a foam roller to spread it out works actually well. Be certain that if you have short pieces to gum those ends together too.
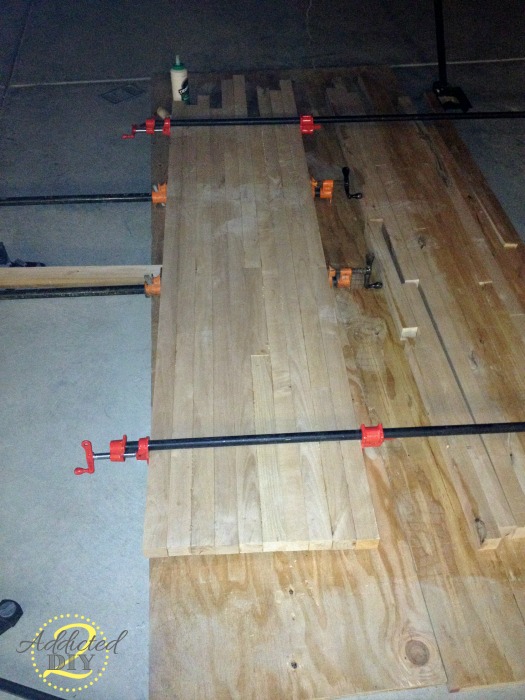
When sticking the pieces of wood together, use a mallet to pound any shorter pieces into a tight articulation. Then clench tightly using clamps on the lesser likewise equally the acme. This prevents the glued pieces from bowing, which nobody wants. I only glued half on the starting time night. Information technology was getting dark and I wanted to get dinner started before my husband came back from soccer do with the boys.
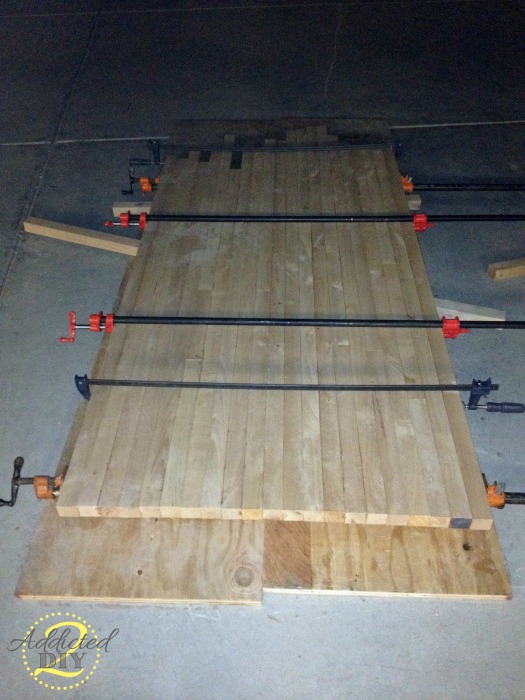
On the 2d dark, I finished putting all of my pieces together and enlisted every long clamp we had in our garage to make sure those joints were tight. You'll have to forgive me for the bad night time pics. My time to work on things is either while my boys are in school or while they're in bed.
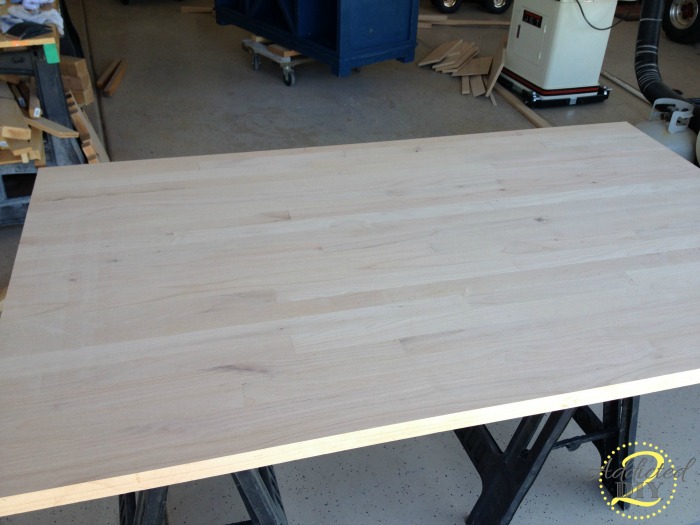
I let information technology set for 24 hours and then took it dorsum to the forest shop and had them terminate it off for me. They cut it down to size, squared up the ends, so sanded it smooth for me. When all was said and done at the forest shop, the tabletop when from approx one 1/2″ thick to a little over one 1/iv″ thick. When I got the table summit back dwelling house, I used my orbital sander to round the edges and sand it completely smooth with 220 dust sandpaper.
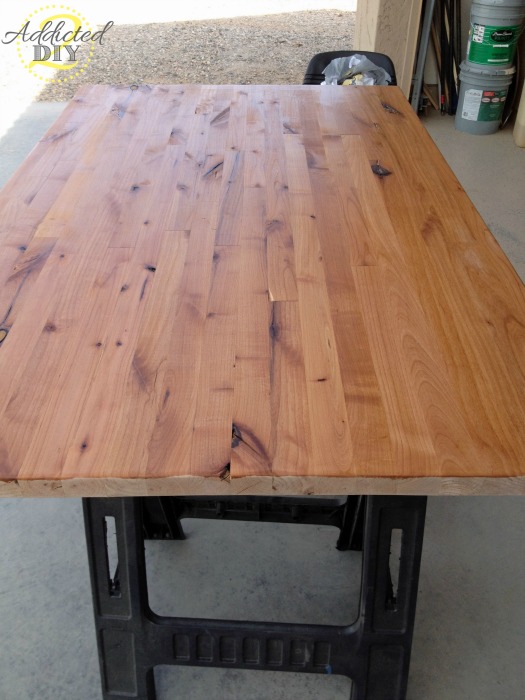
I used butcher block conditioner on both sides of the butcher cake. This is the bottom side. Y'all can see that the conditioner actually brought out the warm hues of the alder.
Information technology turned out so much better than I had imagined information technology would. To be perfectly honest, I was freaking out when I was gluing it all together. I was afraid information technology would take a lot of gaps or that information technology would just fall apart on me. Truth be told, at that place are a couple of tiny gaps where the ends didn't join perfectly together. The proficient news was that several websites I looked at said to use a mixture of beeswax and mineral oil to fill those gaps. Guess what the butcher block conditioner is made of? I just made sure to take extra intendance to put more than of the conditioner in those picayune gaps.
If you lot are looking to save a little money on your project, or if yous are like me and you sometimes experience like it's non DIY unless EVERYTHING is done yourself, I hope you lot volition find this tutorial helpful. If you have leftover wood like I do, you tin as well make some cutting boards with it. I'yard thinking those would be fun Christmas presents.
I seriously honey to hear your comments, so please let me know what you think! Also, sharing with friends, liking, pinning, and tweeting is always welcome!
~Katie
This post contains some affiliate links for your convenience. Delight click to read my full disclosure policy.

How To Make A Butcher Block Minecraft,
Source: https://addicted2diy.com/how-to-build-your-own-butcher-block/
Posted by: boothfrass1954.blogspot.com
0 Response to "How To Make A Butcher Block Minecraft"
Post a Comment